
We've been on a radiator kick lately — cleaning, updating and even removing one from our house entirely. We're loving the updated look so much it has us wondering why we hadn't thought to do it sooner!
We'll be the first to raise our hands as non-experts on radiators. Everyone seems to have an opinion on them — to keep or remove, to cover or leave exposed, to paint or leave untouched. We loved the character and charm they added to our house when moving in (even though they didn't function) and over the last 6 years hadn't really given much thought about them since.
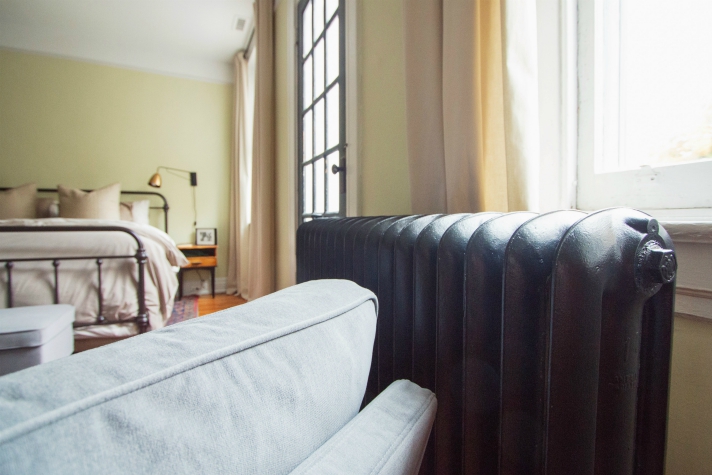
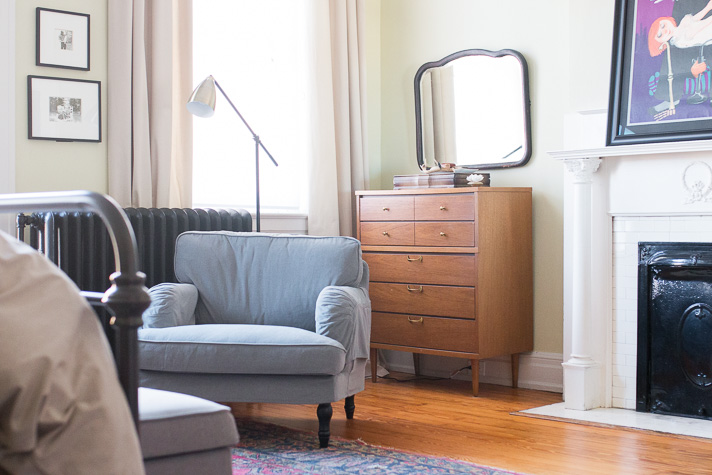
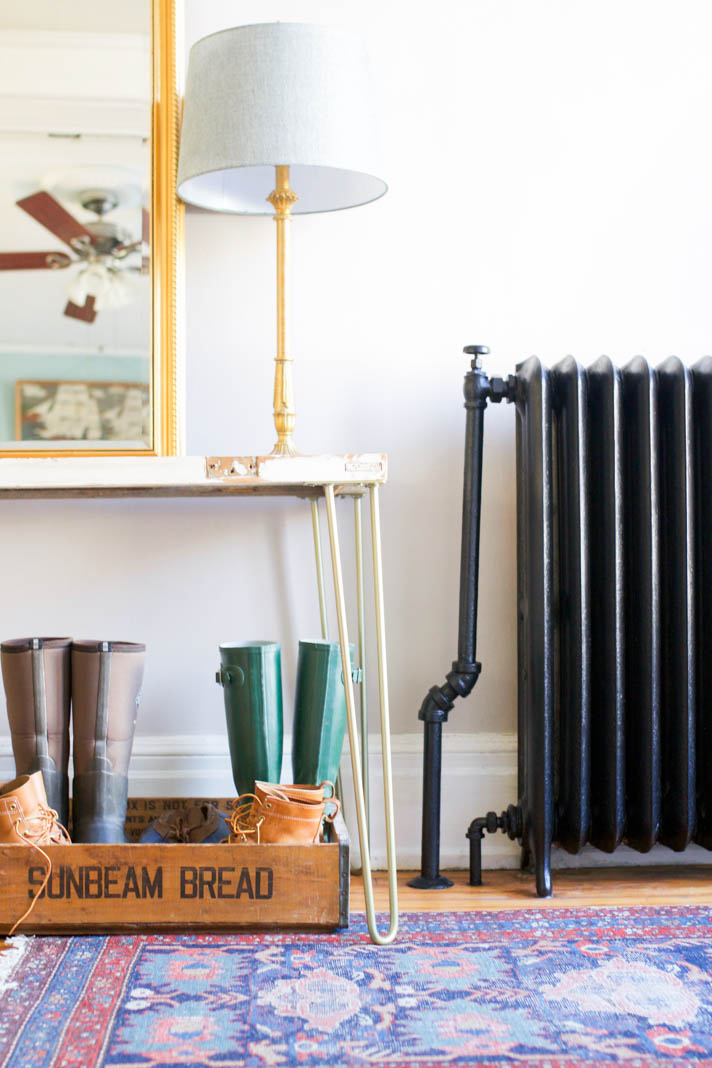
It all started with our bedroom restoration. Painting the radiator in a black satin finish upstairs not only completely transformed the look of the room, but gave this old piece a bit of polish. The fresh coat of paint brought it from what we'll call "rusted industrial" into "clean modern" over the course of an afternoon.
Here's a little before and after with the painted radiator in our bedroom:
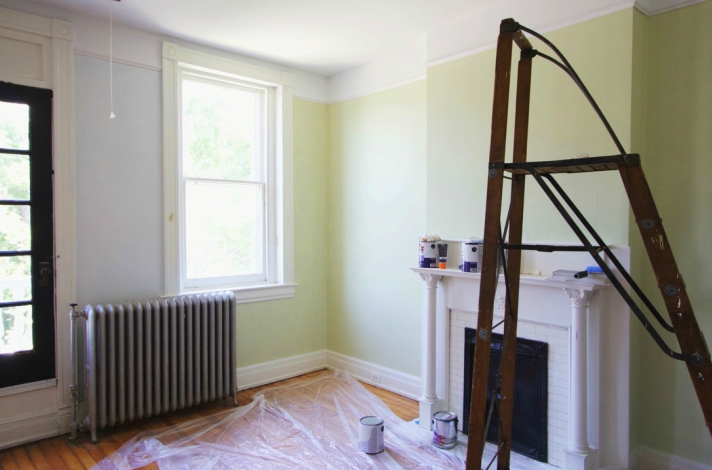
Updating the one spurred a wild hair to take a second look at all of the radiators in our house. We have nine in total since radiant heat was the primary way the homes in this area were heated in the early 1900's. If we had it our way, we would have loved for the radiators to be operational. Unfortunately, we learned after a quick inspection that making that happen would be upwards of a 20K project, so not in the cards right now. Our house has been updated with dual heat pumps which means our radiators are purely decorative at this stage.

While radiators play up the historic charm of an older home, they usually come with their set of unique issues like sunken wood and water damage underneath from years of use and weight under the cast iron. For us, the seemingly impossible dust to reach and clean has been a persistent battle!
Painting a radiator is a fairly straightforward project that can easily be knocked out with two coats over the course of a single day or weekend. That being said, anyone that's tried painting one of these while it's still attached to the wall knows how tricky it can actually be when it comes down to it. After painting three of ours in recent months, we've developed a few go-to tricks and techniques.
1. Choosing paint: For decorative radiators like ours, look for paint that's formulated to work with metal surfaces; an 8 ounce can (like this
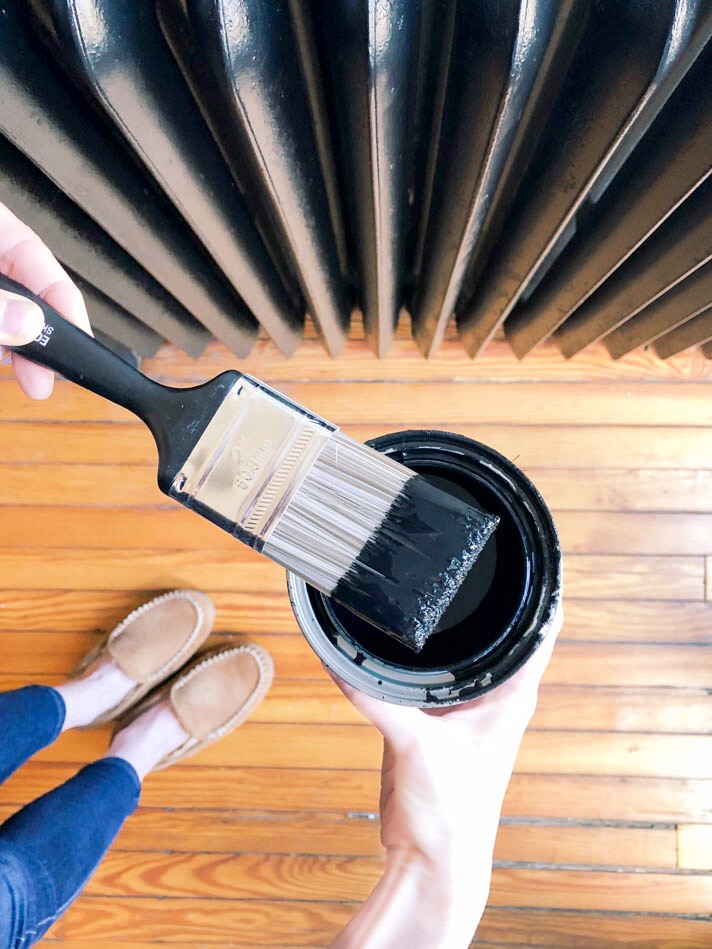
2. Cleaning: the best way to set yourself up for success is giving the radiator a thorough dusting. This will ensure a smooth application of paint and keep from dirty particles picking up in every swipe of the brush. We found years of dust bunnies hiding behind and inside the fins of each of our radiators. We definitely dust on the regular so it was both terrifying and cathartic to know we'd gotten every last hidden nook and cranny.
Tip! A Swiffer

3. Protecting: The single best weapon in our paint arsenal is a large plastic drop cloth
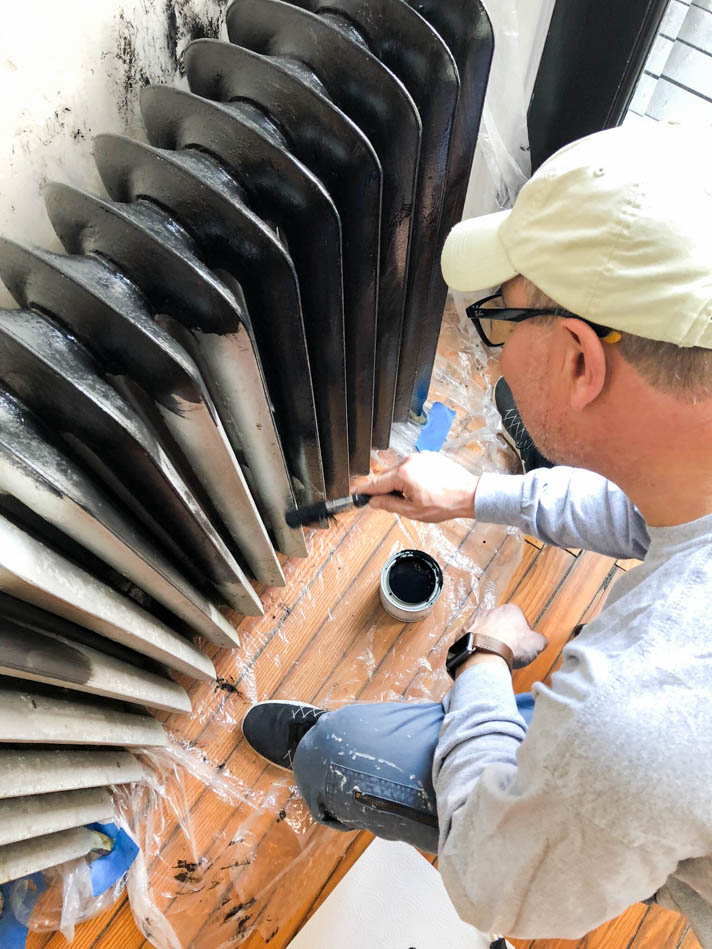
4. Attention to Detail: One of the keys to a professional looking finish is covering the details. Radiators are elusive — they appear to have a simple exterior but in reality, there are interior fins that, if not painted, will show through on your final job. We quickly learned to go ahead and reach the brush through to the inside in order to get full coverage. The rest is pretty straightforward — just don't forget the small curves on the inside and bottom!
Tip! Don't choose your best brush in the arsenal for this job. Instead, go with the simple .99 cent brushes at your local hardware store, because you might go through 2 or 3 on each radiator due to the effort to get in-between each fin. Also note, painting pants are a must for this job :)
We're loving how transformed our front entry feels. For anyone curious about the table in our entryway, we made it from an antique glass door we salvaged from our back alleyway. You can read up on that project and see a whole host of photos of how little our entryway has evolved over the past several years in this blog post.

In related news, we recently decided to have one of our larger radiators removed entirely from the family room. I told you we were on a bit of a kick around here! We'll share all the details behind the removal in an upcoming post, so stay tuned.
Anyone else falling in love with black as a paint color right now? Mary thinks it's having a major moment. Around here, we've loved how black has acted as a classic accent on our front doors, carriage house doors and now our radiators. We're even toying with the idea of giving our staircase an all-black update later this year.
Discover More:

No comment other than I enjoy reading your blog.
ReplyDeleteThanks Russell! We enjoy having you as a reader!
DeleteBest, Tim and Mary
What a timely post. I'm looking at my ornate radiators with peeling silver paint. I foresee a summer project. I'm unsure what color to go with though.
ReplyDeleteYay! We are sure any color you choose will look fabulous! Good luck with your project and let us know how it turns out!
DeleteBest, Tim and Mary