
As you know, it's wedding week here on the blog. Yesterday we set the rewind button back to our engagement, showing off several of our favorite shots from our engagement session. Today I'm excited to talk more about our save the dates, detailing out why we chose what we did and how I made them.
With so much to plan and a budget to keep in mind, save the dates were one of the first DIY projects I took on for the wedding. Since DIY elements were important to us, this was one of those projects I couldn't wait to get started on. We both agreed that less traditional save the dates suited us just fine (heck, our relationship is anything but traditional), so we went the postcard route. Because the wedding ceremony would take place in a garden and we're such big fans of sustainability, we thought it would be a fun twist and tie-in to make our save the dates out of seed paper that could later be planted instead of ending up in a landfill.
At this stage, I knew the focal colors for the wedding would be centered around gold with hints of pinks, greens and grays — so I wanted to tie these into the save the dates as little preview of things to come. We ended up going with a minimal stamped text design on the front, reserving the backs for more information. These save the dates were a really fun place to start and we were thrilled with how they turned out in the end.
So, let's get started!

Supplies:
- Seed paper (we got a thick cardstock from Flower Seed Paper on Etsy)
- Personalized stamp
- Gold ink pad
- Printer
- Paper trimmer or x-acto knife and non-slip ruler
- Scissors or corner rounder
- Postage stamps
To make the stamp, I created a very simple text design using a fancy calligraphy font I'd downloaded for free from dafont.com. I kept the wording very simple, including only our names, location and date for the front of the card. I felt like the texture of the seed paper and metallic shimmer of the gold ink would add just the right amount of embellishment without going overboard. Once I had the design, we had a custom stamp created from rubberstamps.net that would fit nicely within the dimensions of the card.

While waiting for our new stamp to arrive, I picked up a gold ink pad (like this) from the local craft store and began designing the backs of the cards. We reserved the backings for a link to our wedding website and instructions on how to "let love bloom" by planting the seed paper instead of throwing the card in the trash.
Once I had the backing design right, I formatted it so 4 cards could fit onto a single sheet of the seed paper and printed out test versions on regular paper until I had everything lined up perfectly:

Next up, I printed onto the actual seed paper sheets and began cutting them to size. A ruled paper trimmer comes in handy for a project like this — if you don't have one, an x-acto knife, non-slip ruler and a little patience will do the trick. After everything was cut to size, I carefully rounded the corners on each of the cards using scissors:

Once the stamp arrived, I was good to begin hand stamping the fronts of each post card in the metallic ink.

I loved picking the cards up and watching the text shimmer, as the light hit them just right.

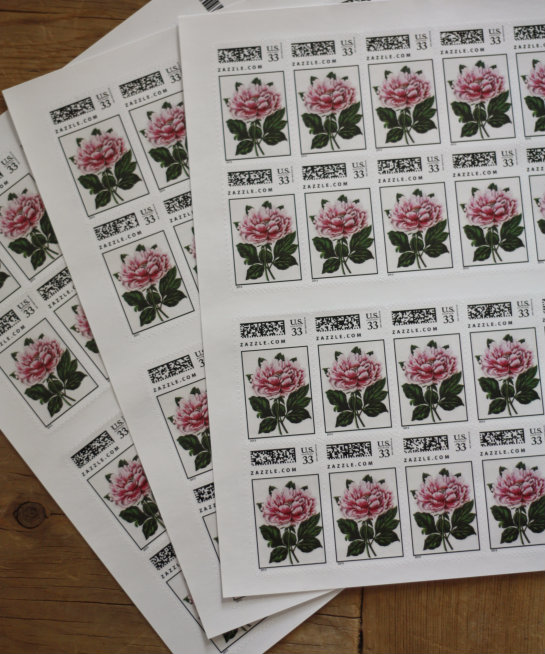
I finished the postcards with custom pink peony stamps I'd ordered from Zazzle. I knew I wanted stamps with fresh pink peonies since the ceremony would take place in a garden setting and pink peonies would be the focal flower in our floral arrangements. You can read all about how to make custom stamps in this post we published back when we first ordered them. Tip — don't forget to order postcard stamps if you make postcards since they are less expensive than regular postage stamps.
All that was left was addressing the cards and shipping them off. My wonderful mother took an afternoon to come help me address every last card, share stories from past family weddings and lend a loving ear for all of our own ideas and plans.
It may sound funny, but the most nerve-racking part of this project was actually sending these little postcards off in the mail. They'd become little heirlooms in my mind, were the first wedding project I'd tackled and symbolized the official start of things to come.
In the end, here's a shot of the save the dates pieced in with our full wedding paper suite:

Image by Tori Watson of Marvelous Things Photography
We'd held onto a few of the cards to keep for a scrapbook and I think that while not a perfect match, they tied in nicely with the overall feel once all was said and done. We'd love to know — did you take on DIY portions of your wedding? Did you go more traditional or are you also on board with the less traditional postcard route? There are so many options, it's always fun to hear what others choose!
Discover More:

So... did anyone plant the seed paper? Did it work?
ReplyDelete