To give a little background, we live in a 100+ year old, railroad style home where the original kitchens would have been configured in the furthest back room of the house (where our current dining room is). One of the reasons we fell in love with this house when looking was the fact the kitchen had been moved into the center of the home. When it was updated this way, all the main components of the kitchen (cabinets, oven, sink, dishwasher and fridge) were all installed along the right side of the wall, with an island in the center of the room. Given our 11ft ceilings, that left us with a large blank palette of a wall to work with. Because you can see this wall from the entry of our home, it was important for us to fill it out, giving it a little personality.
The last update we made to this space was the addition of our storage console that we built out of an old army locker (we wrote up all the details on that project in this post):

While we loved the addition of the console, we were still lacking in filling up some of the unused vertical space on this wall above it:

Throughout the year of living with the console as is, we came up with a plan to install an exposed shelf above it, allowing room to elevate the artwork, and add in some extra storage to help fill out the space better in hopes of making it feel more like a purposeful part of the kitchen. We love the look of the bracketed exposed reclaimed wood shelves we keep coming across in design publications and Pinterest, so in true-to-us fashion we decided to try and make one of our own.
Once we had the idea, it was just a matter of finding the perfect material. We considered using reclaimed floorboards, stair boards or beams from our local antique salvage warehouse, Caravatis, but never quite found that special something that worked. It wasn't until we started working to help update the 1976 Airstream camper with our friends, that we came across the perfect board for our shelf — remember this pile of milled wood from Josiah's farm?

He was kind enough to give one of them to us, especially for this project. After bringing the board back home, we cleared out the wall (that's a lot of bare wall) to measure and got down to business!
To create the shelf, we measured how long we'd need the board to be, then Tim prepped it over the next couple of days by cutting it to size, sanding the surface, applying a thin layer of Thompson's oil stain then a food safe sealer in a satin finish (to add a slight sheen):


Meanwhile, we picked out some basic metal brackets from the hardware store that were large enough to extend almost across the entire width of the board. For added security, we went with 3 brackets to disperse the board weight and measured out placement to ensure an even fit:


We weren't thrilled with the white finish on the brackets, but they were the only size and style we liked, so what did we do? We gave them a new oil rubbed bronze metallic finish with a coat of good old Rust-Oleum multi-surface spray paint, which ties in with the darker metal colors we have around the kitchen:


Once dry, Tim screwed the brackets in place on the underside of the board where we'd previously measured and marked, then we brought it inside to install:

Since the shelf was pretty heavy (too heavy for me to hold up at level while Tim installed), he came up with a little "board balancing hack" to hold it in place while locating the studs and screwing into the wall:


Immediately after installing the shelf on the wall, we were both left feeling a little underwhelmed at how bare (and small) it seemed:

Before going back to the drawing board, we decided to start decorating the shelf to see how things shaped up and man what a difference it made!

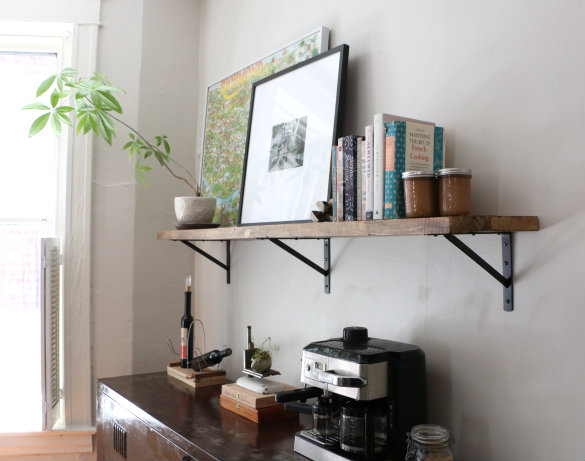
Here's how we looked after that initial styling:

We're loving how much more elevated and "present" everything feels on this side of the room now — it's done so much to add more dimension to the space and doesn't feel too small at all.

We've got a couple more updates to this space coming up that we're excited to share in our next few posts, so stay tuned!
Discover More:
More Decor Projects | All Projects
P.S. Did you notice how well our Money Tree plant has been fairing, even if it does oddly stretch towards the light of the window?

Post a Comment