
We've sort of been all over the place with house repairs around the upstairs of our home lately — we've been tackling a few plumbing issues, repairing wall damage in two rooms and even opened up the plaster wall in Brandon's room to expose the brick chimney hiding underneath. While we've got a lot going on, the most solid progress has taken place in Brandon's room and we're finally at a point where we share a pretty substantial "before and after" progress update for this space! As you can see from the picture above, Basil asked if he could do the honors of revealing today's makeover.

We hadn't done much to this room (sorry Brandon) other than plop furniture down since moving in almost three years ago. We call it Brandon's room, but it functions as a guest room too since he spends the majority of time at JMU. Upon moving in, there were some pretty serious wall and ceiling cracks with bulging around them in the room that concerned us. During our inspection, each of these areas returned as not being actively wet during our inspection, which rendered them under "cosmetic" repairs. Below shows a good picture of how the wall and ceiling both looked upon moving in, which can be normal for older homes with plaster walls:

Over the past couple of years, the wall cracks and bulging along the wall remained the same (something we tucked in the back of our heads to tackle down the road when time and money permitted), however, the ceiling crack at the back of the room only began to deepen, open further and the ceiling gradually sagged until it fell onto the floor about 3 weeks ago. We actually heard it fall to the ground when we were having tile demolition done in our shower — hey, when it rains it pours, right?

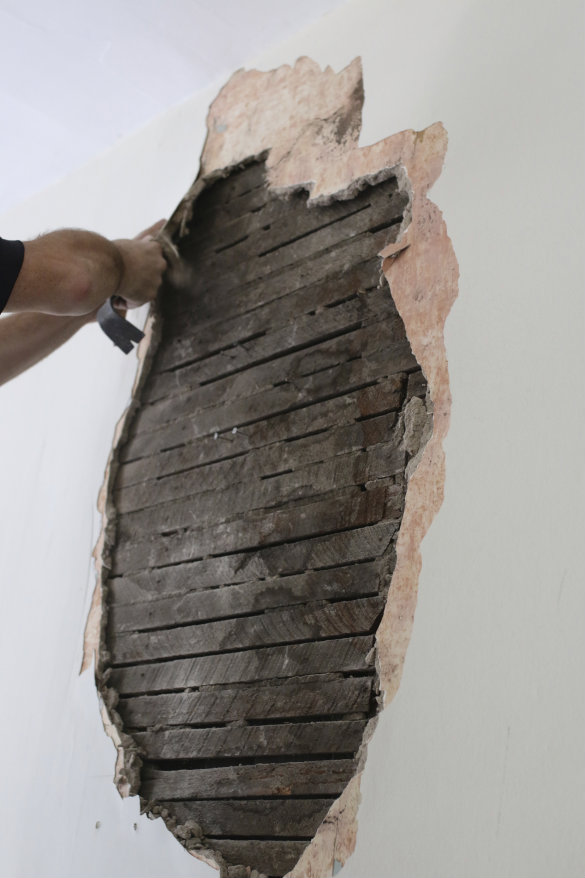
We were left with exposed wood lath and layers of history showing through in the walls — pushing the boundaries of the "industrial chic" style we usually go for, ha! We'd recently had extensive roof repairs done to take care of any outstanding water issues, so we at least knew this area was free from further damage, even though it looked ridiculous.
You might remember how we've tackled restoring the plaster walls before in Stephanie's room ourselves, but felt like the ceiling in this room was a different skill level then we felt comfortable taking on at this time. So we ended up calling in a professional to come take a look after completely clearing out the room.

He gave us the option of patching the ceiling with plaster or a patch of sheetrock with plaster skimmed overtop. We opted for the sheetrock since the area was pretty small, we wouldn't be messing with any of the original lathe underneath and it could be taken care of very quickly. While he was there, we opted to have the same style of repair done of the wall that had cracks and bulges from moving in.
It was fascinating getting a chance to see the wood lath underneath the walls, and how sheetrock can be screwed in, then covered in plaster to match and flatten the wall:

It was the same process for the ceiling:


We hired the basic repair and patching, but let our specialist know we'd handle prepping the lath, priming the patch and painting the ceiling and walls ourselves. Not only do we like painting, but it helped cut down on overall work budget by doing the portions of the job we felt comfortable handling. Our guy was very amenable to this, and even gave us tips for the different areas he thought we could tackle on our own:

Speaking of painting, we had Brandon pick out any paint color he wanted, so long as it fell within the Restoration Hardware color palette, ha! We're huge fans of the RH line of paints and have used it in every room we've painted in so far (the entire downstairs, upstairs hall and Stephanie's room). It's eco-friendly, goes on so easily and the color palette matches with anything — we rely on their paints anytime we're talking about freshening up a new room.


Another one of our favorite tricks for freshening up a room is installing bright white light switch/receptacles plates — just look at the difference:

In-between the ceiling/wall repairs and painting we also decided to expose the brick chimney behind the plaster walls at the back of the room:

We realized there was brick back there when the ceiling fell in, giving us an inside peek behind the walls:


We absolutely love how it turned out, and feel like the brick chimney is now the real star of this room. You can check out the entire step-by-step process we went through (with video!) to expose the brick in our latest project post over on eHow.
So! How about a look at some proper "before & after" shots?
Here's the look at this space as you first walk in from our upstairs hallway:


The transformation for this view is probably the most dramatic. The little ledge you see poking into the bottom left of the above shot is actually the entrance to a back staircase we have leading back downstairs. Here's a better shot of the ledge from this below view, if you were to walk into the room and turn around, looking back out at the hall:


To give you an idea of how pleased we are with the wall repairs, here's a reminder of the cracking and bulging plaster we lived with, followed by the smooth, clean wall we have now:

And last but not least, facing the back wall of the room, where the bed frame nestles between two bookcases:


With the ceiling and walls patched, a fresh coat of paint, and the exposed brick — we're really feeling the transformation of this room. We've still got plans to make sconces to replace the ones above the bed (hence those empty holes) and we'll add in decor to fill up the walls, but progress is progress!
Thanks for stopping in to take a look!
Discover More:

Just a quick suggestion, if you're cool with it: You might not wanna put your TV directly on your cable box. The only reason I say that is, uh, my parents recently burnt out their cable box that way, and apparently the cable guy was like "Ha ha, yeeeah. This actually happens all the time. We should probably tell people not do do this."
ReplyDeleteBut that aside, holy crap. I love the rough brick against the minimalistic everything else! It looks so fantastic. The whole design is really clean and just looks beyond awesome. Great job as always, I'm not even remotely surprised that this turned out so nice :D
-Ruga
We are attempting this so thank you so much for your blog post!
ReplyDeleteJob looks good.I am currently in almost the same situation you experiencd with your ceiling and brick chimney. I believe my issue stemmed from moisture due to poorly installed flashing. This has since been fixed, now it's time to address the damage caused by this moisture over time on the inside. Bubbling and blistering and falling off horse hair plaster in 3rd store bedroom. I will remove all the plaster on the chimney. I noticed some of my bricks are soft,almost powdery, did you experience this issue? I like the idea of the exposed brick. Regarding the brick sealant, would this cause spalling and deterioration of the brick since I would think this would not permit the brick to ” breathe "? I read somewhere to use a vapor permeable sealer. Once again great job and any comments would be appreciated.
ReplyDeletenice
ReplyDeleteI am so glad I found you! I was just googling "exposing brick chimney" and came upon your site. I too have a beautiful old RVA home that has had its share of similar issues to y'all. As someone who has had a go of it since buying the house (only a few months ago) it's nice to see I am not the only one tackling so many things at once.
ReplyDelete