
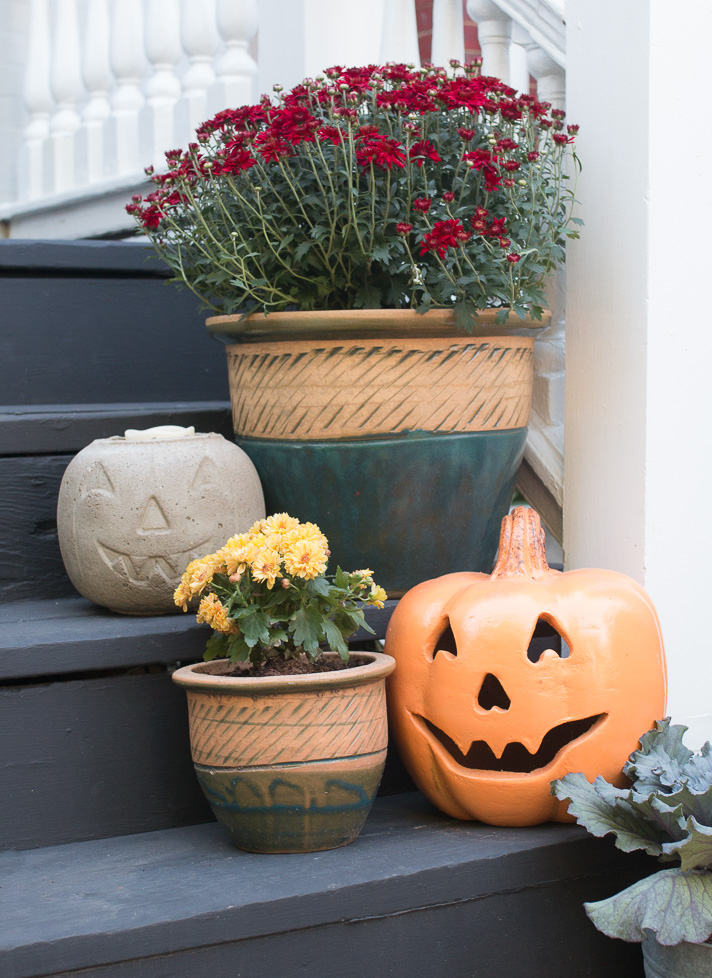
This year, we've introduced a new friendly face among the bunch of fall decor out front. Can you spot it?
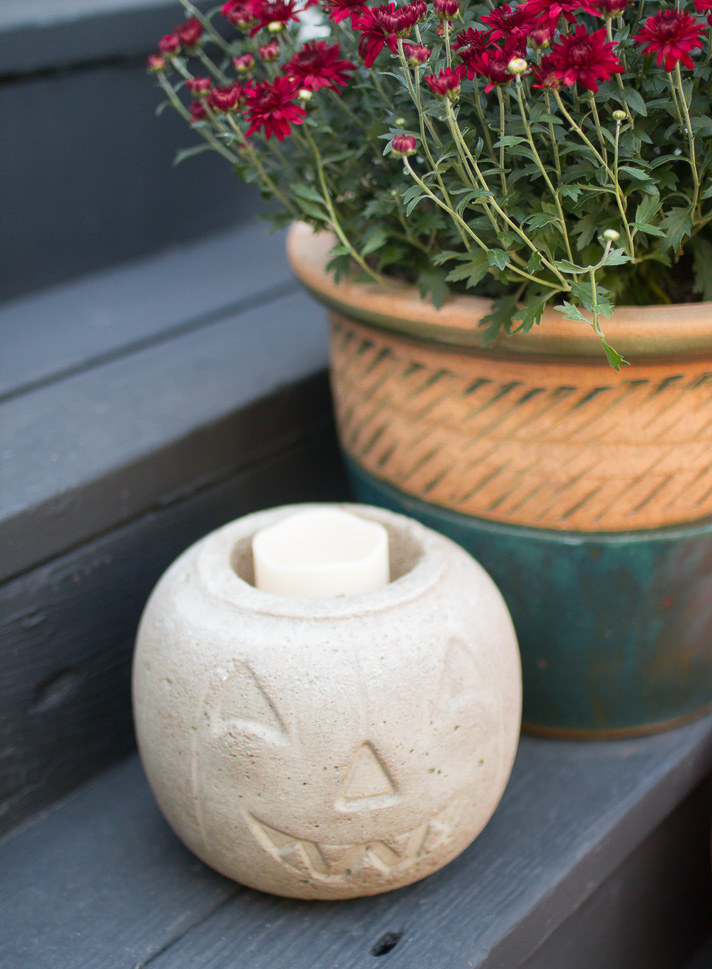
This natural gray jack-o-lantern, made from concrete, is our latest DIY project and the newest addition to our little patch of permanent Halloween pumpkins that grace our front stairs. It even has room to hold a flickering candle or a bright bunch of mums.
The concept is so simple — using a plastic pumpkin bucket as a mold for quick drying concrete. This project is a good one for beginners (or little helping hands) and can be completed over the course of two afternoons, making it a perfect weekend activity.
While on a recent thrifting run, we'd come across a lone bright orange plastic pumpkin bucket just perfect for repurposing. These classic kind of pumpkins are pretty easy to find at dollar stores and big-box stores like Target during October, or online year-round. The key is finding one that has indentations for the face in an expression you love. If the face is only painted on, none of the expression will carry over into the final piece (which is fine if you prefer a simpler look).

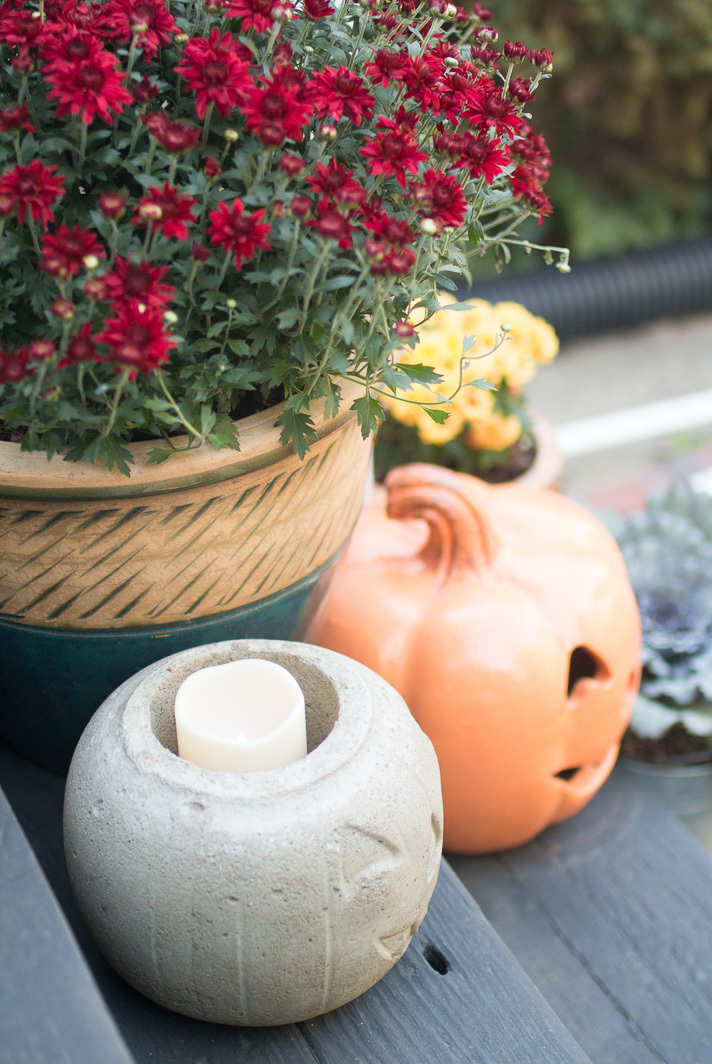
While we settled on a single pumpkin, I love the idea of making multiples in varied sizes (like these!) to use for stacking along the steps or grouping in a patch as an autumn centerpiece. There are so many fun options to choose from with a project like this.

The process is simple but does get a bit messy, so best to gather the materials and work outside or prep an indoor space with ample coverings as a first step.
You'll Need:
- Plastic pumpkin bucket
- Quikcrete or fast drying cement
- Mixing bucket & stirrer
- Trowel
- Cooking spray
- Plastic paint cup
- Weight
- Box cutter
- Sandpaper
- Matte clear finishing spray
- Flameless candle

Mix the cement with water according to the package directions. We used just over one-half of a 60-pound size bag of Quikrete to fill our standard size plastic pumpkin. Just before filling the pumpkin with cement, give the entire interior a healthy coating of cooking spray. Doing so provides a barrier against the wet cement sticking to the walls of the pumpkin as it dries, which makes for a much easier removal from the mold and avoids any added chipping.

Spray the outside of a plastic paint cup (like these
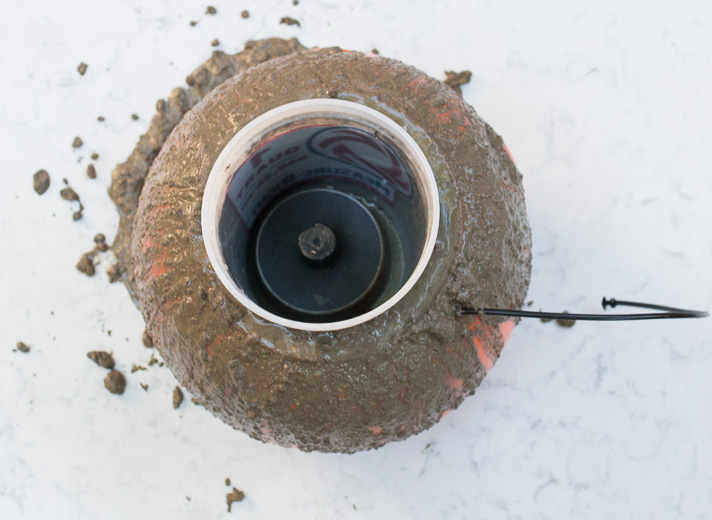
Place in a cool, dry space and allow to dry for at least 24 hours — it's even better to leave for two to three days if you have the patience and time.

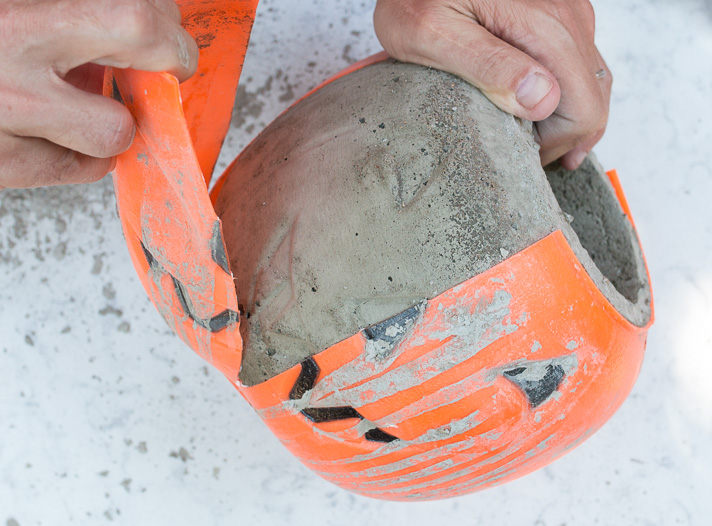
Once dry, it's time to break your new pumpkin free from the mold! Start by removing the paint cup — with some gentle twisting it should come loose easily.

Next, use a box cutter to slice along the top of the plastic rim. Try and align the blade with one of the natural ridges in the pumpkin. Apply just enough pressure to cut cleanly through the plastic without digging too deeply into the cement.
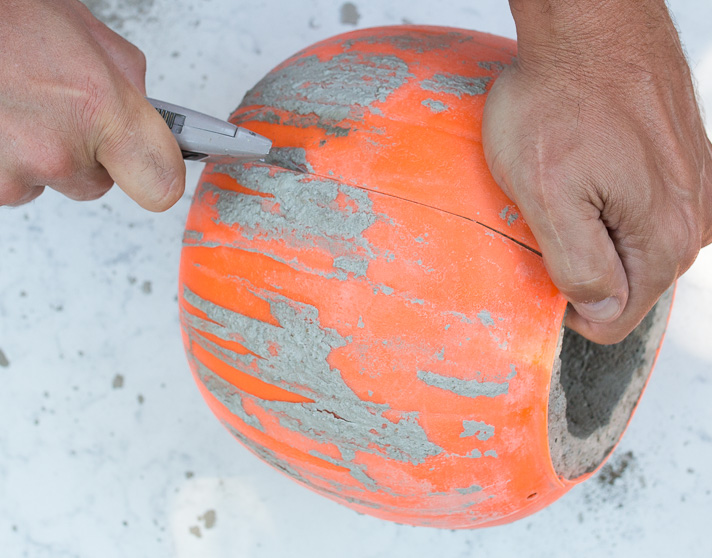

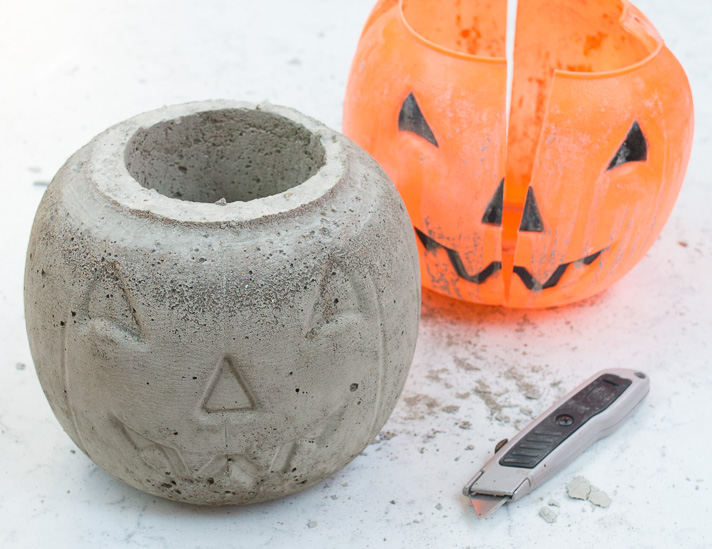
Sandpaper or a sanding block will smooth away any rough edges or areas where the box cutter cut into the sides of the pumpkin.

At this stage, the pumpkin is ready for finishing touches. It could be painted all over or just in areas that enhance the face. We like a much more natural look so forwent any paint and simply finished with a few thin coats of low odor clear finishing spray, which eliminates all the chalky residue that results from handling raw cement. Your hands and clothes can thank me for this tip later.
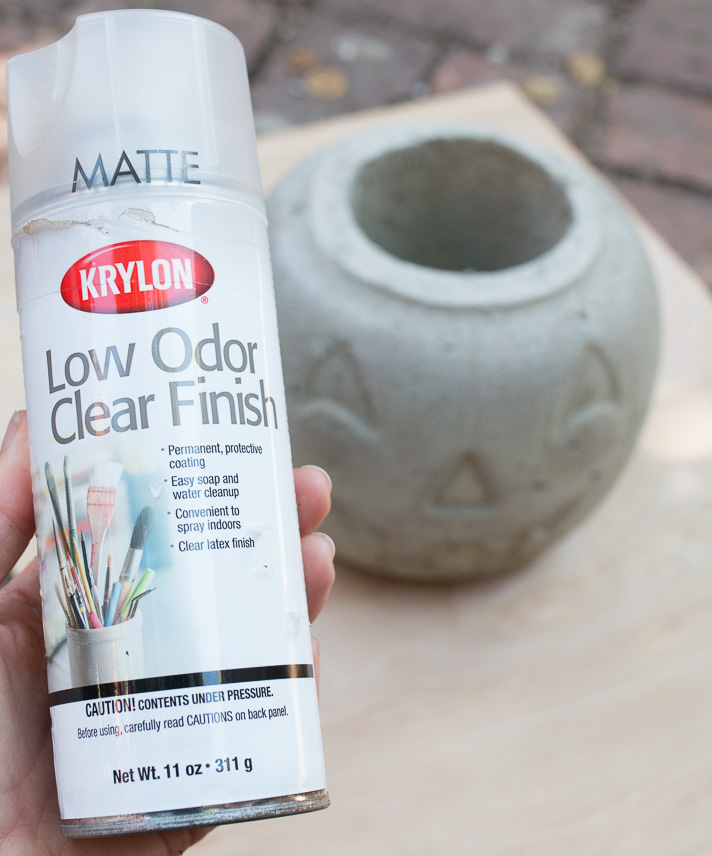
I love this particular spray because it produces a matte finish which preserves the natural look and original quality of anything it touches. A single can has lasted us through several projects and you can find it at most craft or hardware stores, or online here
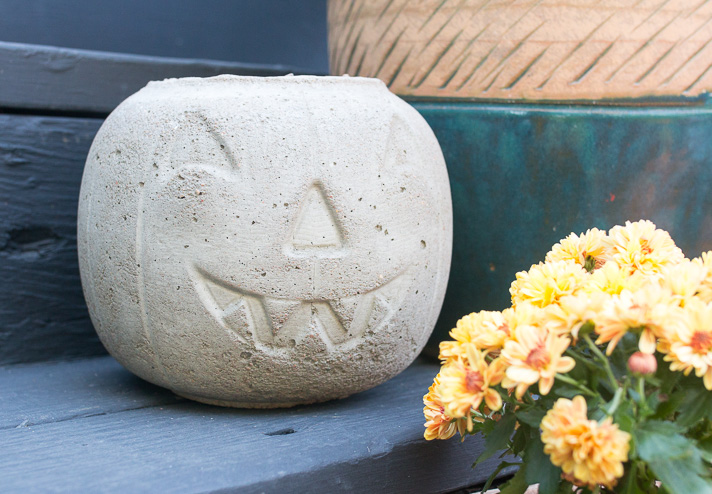
Now your pumpkin is ready for decorating. It can work as a candleholder and just as well as a planter. Because it's been sprayed, it's well suited for indoors (think centerpiece or entryway) and outdoors just the same. The weight of the concrete ensures your pumpkin will stay put and can even stand up to tougher jobs, like acting as a doorstop.
We're enjoying our little jack-o-lantern out on the front steps and nestled a flameless LED pillar style candle


We'll always love a good trip to the pumpkin patch to pick out fresh varieties, but like how these more permanent versions give us the option for decorating earlier in the season and for years to come. They're like old friends that come back to visit us each autumn.
On a related note, we're also thrilled with the difference a year (and a fresh coat of paint) made for our front porch. You may remember we had the entire exterior of our home painted last winter, and boy do these steps feel like they have a new lease on life! See what I'm talking about in this shot from our fall porch decorations this time last year.
Cheers to the season guys! Would you try a pumpkin project like this? We'd love to see your versions and how you end up using them if you decide to give it a go.
Discover More

Very cool! I can't wait until we're back on the Mainland/living in a house next year and can actually decorate for fall!
ReplyDelete