
While grocery shopping at Whole Foods Market last weekend, Tim and I picked up a small crate of clementines to have around the house. They're perfect for a little snack, and so easy to peel open. Once we got them home, I remembered a diy project I'd wanted to try that I'd read a while back on Apartment Therapy — making natural candles from the clementine peels.
The project was surprisingly simple, and I love how the entire candle is made up of the clementine peel — even the wick. They burn for hours, smell amazing, and just give off an enchanting glow. I was even able to put my own little spin on the clementines to make my version of the candles a tad more holiday focused, which I'll get into below.
How to Make Natural Citrus Candles from Clementines
Materials:
- Clementine oranges — as many as desired for candles, plus a few extras for "mess-ups"
- Sharp pairing knife
- Olive oil
- Book of matches or long handled lighter (preferred)
Gently and evenly slice around the center of the clementine, piercing all the way through the peel. Working your fingers gently underneath the peel to gently remove each side — these will become the base and cap for your candle.

 Be careful not to tear any part of the peels when removing and the most important part of this step is in getting a good "wick." At least one side of your peeled caps should retain the long piece of flesh that extends from the center of the peel cap into the middle of the clementine. It may take a couple tries, but retaining at least a small portion of this fleshy part of the clementine is essential — since this piece will become your wick.
Tip: after trying with several clementines and only getting a couple good "wicks" I realized I could actually cut the entire clementine in half instead of just slicing around the center — then gently remove the sections from inside the halved peels. This method made it much easier to retain that fleshy part of the clementine intact without have to pull on it (sorry I didn't take photos of this little trick once I got there).

Once you have at least one peel with wick intact, lay it flat like a bowl on a sturdy surface and pour olive oil in the base, enough to form a generous pool. You'll want the oil to soak in the clementine peel and wick for about a minute or so before trying to light — you'll also notice the peel will actually absorb a good amount of the oil itself, making it seem more translucent.

While allowing the base peel to soak up the olive oil, this is the perfect time to move onto making the candle cover with the other half of the peel. Simply cut desired shape from top peel. I chose to try a star shape for my first go round since that was the example in the Apartment Therapy tutorial. I also used the same pairing knife, but this might be a great step to use a small sharp cookie cutter for a uniform shape and slice.


Once bottom peel has soaked in oil for a minute or so and you have your cap ready to go, it's time to light your clementine candle. This can be a tricky part since it takes a good little while for the wick to actually take the flame. This is where a long handled lighter works wonders since you can simply hold the flame over the wick for as long as it takes instead of lighting match after match.

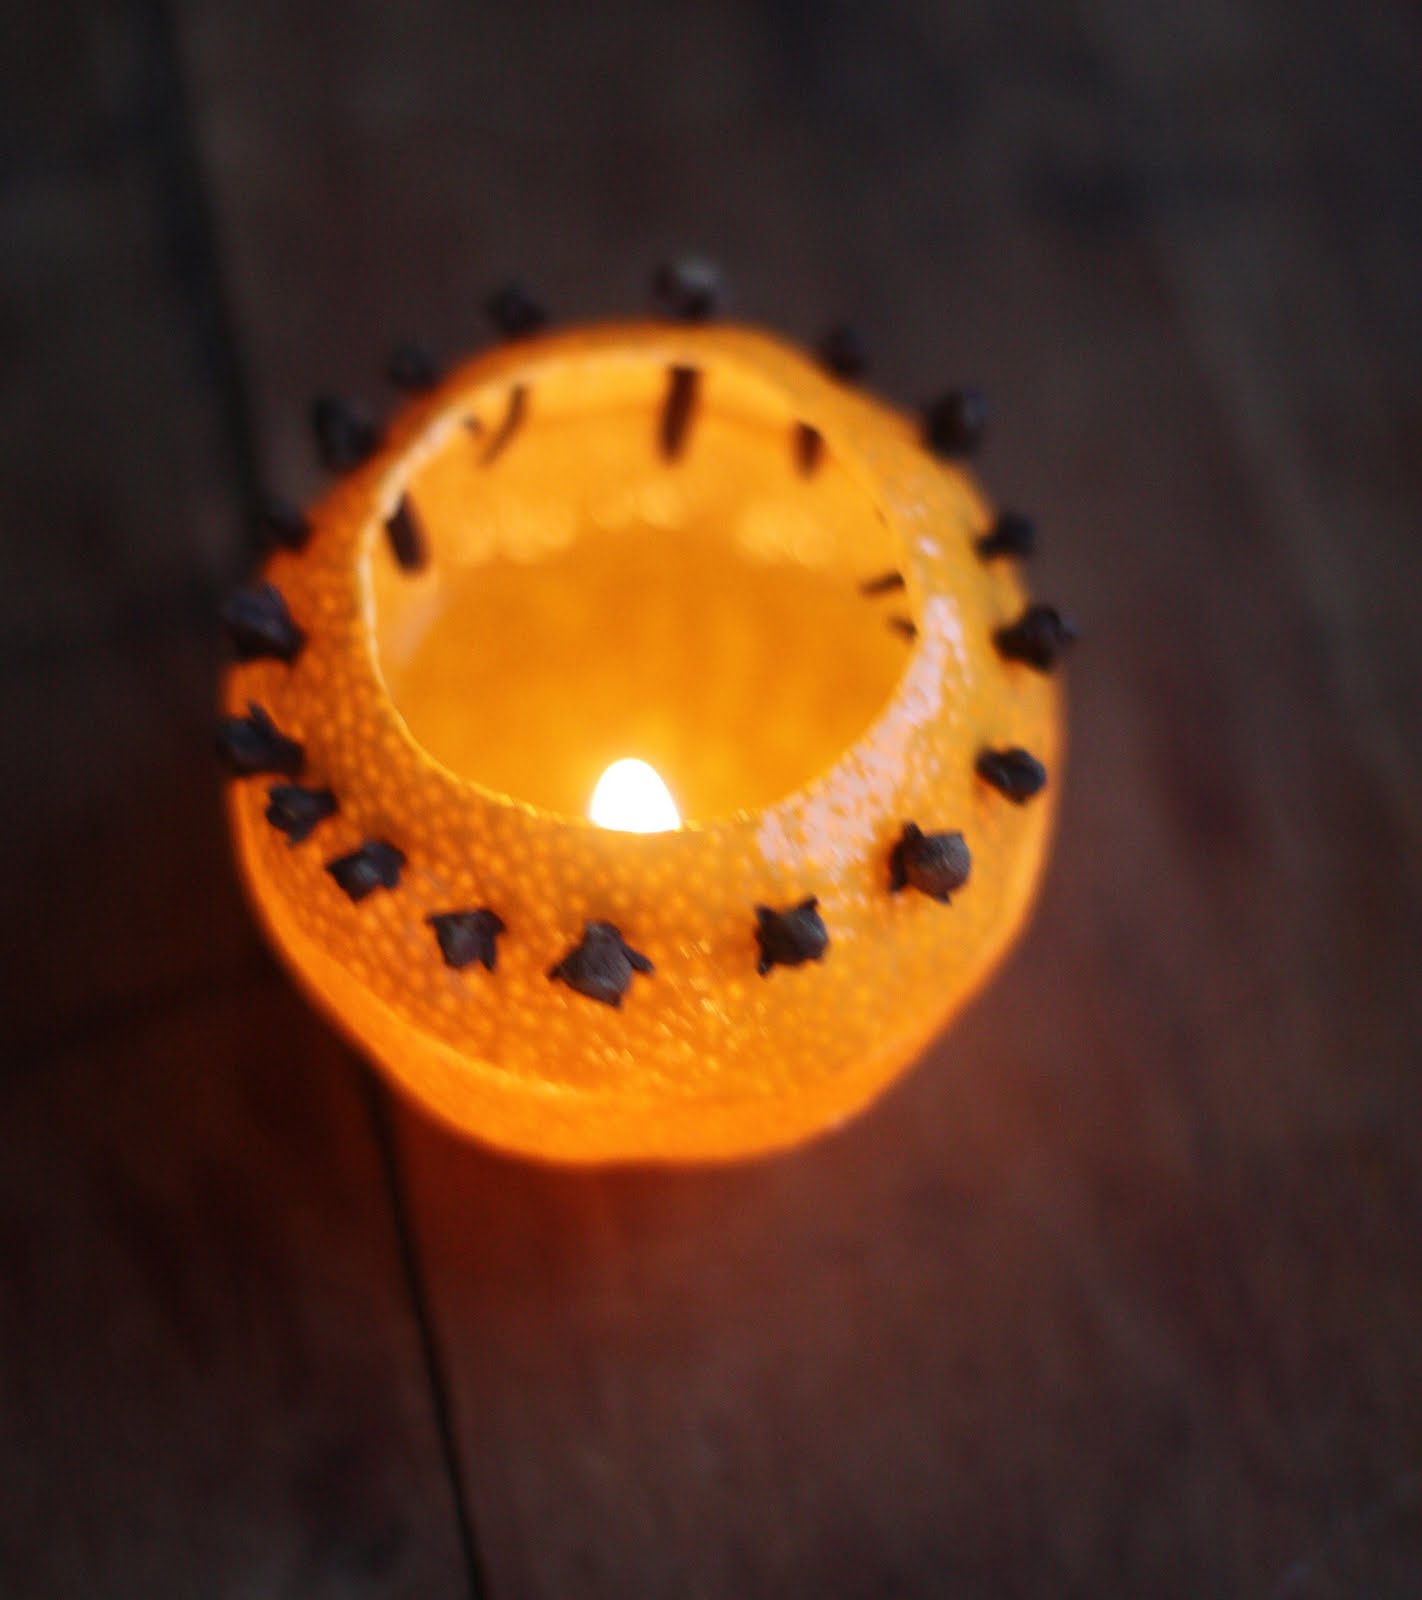
Place topper over base and you're all set with a beautifully glowing and amazing smelling natural citrus candle:

A little word to the wise: see that tad bit of scorching in the inner star corner of my first candle there above? I learned through trial and error you need to keep the "wick" or fleshy part of the candle short, and make sure the shape you create in the cap of the candle is wide enough to avoid the direct flame. I had a hard time not getting the top of the candle to burn — that's where my creative variation on the original tutorial comes into play...

I literally started over and cut a large circle as the topper for the candle. Once I was happy with the width, I pierced the rim of the cap with whole dried cloves. Not only did they smell amazing, but added a little ornamentation and felt a little more seasonally fitting with the holidays.


Our candles burned and burned — so long that we added more olive oil once it had almost burned up. We let them glow for at least a few hours and I have no doubt they would have burned all evening long if we had let them. At first, the candle is flimsy and hard to pick up but once they've burned for about 10 minutes, the shell becomes firm and more easily transferable.
I'd say these candles are good for about 2 days before the peels begin to dry out and lose their shape. They'd be perfect to make the day before or morning of an evening party, holiday get together, or celebration.

I hope after seeing how simple and festive this little candle project is, you might try it out yourself! It would be a great holiday activity to take on with the kids* and use in your holiday celebrations.
*Safety Note: As with all projects containing sharp knives, hot oil and fire, it's best to use adult supervision if involving the kiddos. Also keep in mind with open flames, both keeping these little beauties out of the reach of small hands and safely extinguished when unattended.

Another fantastic idea! I bet those smell divine and to know you're not breathing in icky chemicals makes it all the better for me.
ReplyDeleteI love the touch of cloves you added, so cute and clever!
This is definitely on my list of things to try this holiday season. The candles look awesome and I'm sure they smell spectacular. Love the addition of the cloves!
ReplyDeleteWhat a great idea and they probably smell great!
ReplyDeleteLove clementines - so while I am eating one I can't wait to making a few for Christmas!
I hope you all got a chance to try making them and if so send us some pics! We're thinking about making several to place around the house over Christmas Eve when our family is over.
ReplyDeleteThese homemade candles are so cute. Next time I have clemtines I'll have to try to make a few.
ReplyDeletePS- I think our Olive needs to meet Basil! Maybe at the next market. :)
Beautiful photography and the cloves really sets off the orange top. Definitely on my list of DIY craft!
ReplyDeleteAny more tips on these after making more for Christmas Eve? I am thinking this will be wonderful for a girls-only-cocktail party I am doing later this month? Are these time consuming, too? What was the ratio of mess-ups to useful clementines? Also, is the smell strong? I actually like strong-smelling scents and citrus is universally wonderful! Thanks!
ReplyDeleteShannon- these would be the perfect idea for an evening party.
DeleteOnce you get the hang of doing one, they are super simple and not time consuming - the first one is the longest.
As far as messups, we had many more messups when trying to remove the peel off the top of the fruit. If you try it by literally cutting the orange in half and gently removing the fruit sections from within the peel (rather than trying to pull off the peel from the cap) you will have more successes than failures.
The smell was nice and the candles were so magic - they are sure to be the talk of your party. Let us know how it goes!
Awesome! Thanks!
Deletei tried with an orange i had laying around, but unfortunately i couldn't get the wick to stay lit for more than a few seconds. i couldnt scrape the base of the wick clean of orange (those segments wouldn't pop out of the skin) and i wonder if that had something to do with it. i could tell from just a few seconds of burn that it will smell wonderful. looking forward to trying again with a clementine.
ReplyDeletemrbazilly we're so glad you tried it — I think you might be right on the orange. One great thing about the clementines is how they separate from the peel so easily! Good luck, these are too much fun to make and so so pretty.
DeleteWhat a great idea. Lovely to look at and I bet to smell as well.
ReplyDeleteThank you for sharing with us.
These were very easy to do and as you noted they looked and smelled amazing. Thanks for stopping by!
DeleteMe encanta!!! Estoy deseando probar!
ReplyDeleteGracias
Be careful not to tear any part of the peels when removing and the most important part of this step is in getting a good "wick."
ReplyDeleteTriple and strong scented candles
luxury scented candles
Reminds me of part of the flaming prep for an ice cream sauce in a fancy New Orleans restaurant. He flamed orange liquor over a cloved long orange peel. That's all I remember before I died from the grand aroma..so, I can imagine how exotic your home smells...
ReplyDeleteCan't wait to try! Thanks.