If you check out our DIY blog page frequently, you might have noticed we gave the entire thing a little makeover of its own!
When we began writing the blog we created the DIY page as a way to keep track of all the projects we'd tackled in one easy place to find and reference. Over time as we kept adding new projects, it quickly turned into an unwieldy link list that was getting impossible to navigate, like so:

Kinda boring, right?
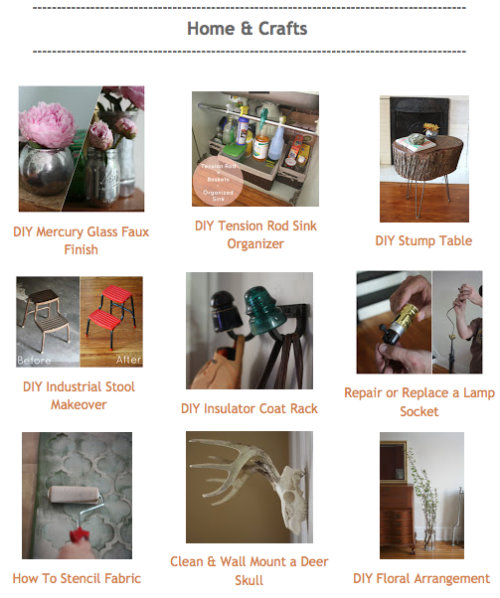
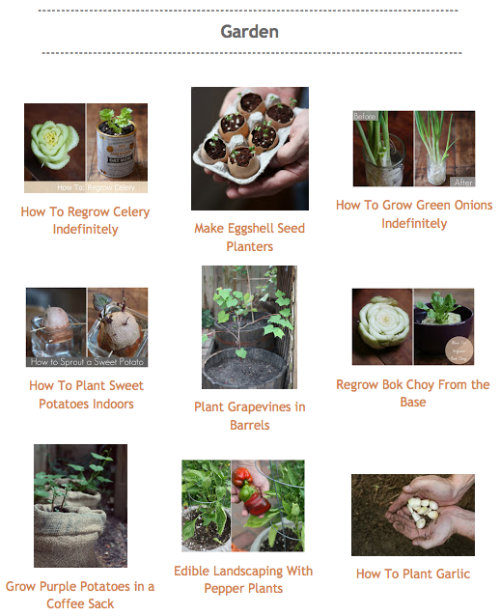
We thought so too, so we organized everything with image thumbnails under categories like Home & Crafts, Garden, Holidays, Food & Recipes, Pets and more:
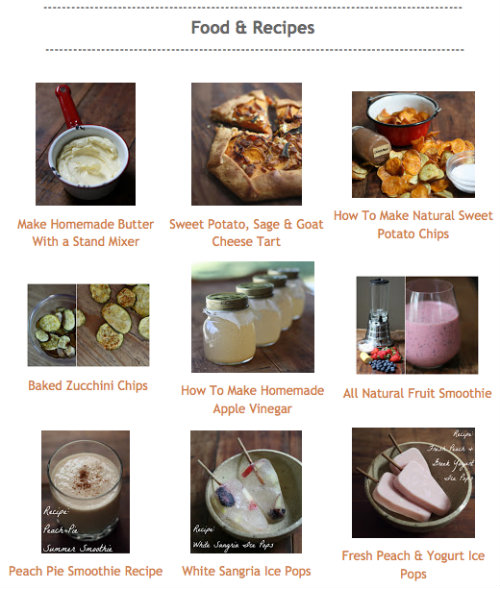
Each image and description underneath is linked to the corresponding project/recipe post and conveniently opens in a new window when clicked.
So now when you want to find things like how to clean and wall mount a deer skull or how to make sweet potato chips, it should be a lot easier to scan and visually pinpoint from
the list of image thumbnails vs. the older never-ending link list. Much Better!
As with most things, this DIY page page will grow and evolve with us. Down the road we'd like to take it up a notch even more — with a little more uniformity and consistency. For now, we're just thrilled we powered through converting each of the linked tutorials into this image gallery. It will be much easier to just slip new projects in one at a time as we tackle them from here on out.
For those of you on the little-to-no coding experience list like us that also want an image gallery for your blog or website, here's the tutorial we used and tweaked to fit our page from Laura's Crafty Life. Neither of us are stellar with coding, so everything you see here on the blog, we've figured out on our own through Googling or just playing around with different settings here and there.
If you are using Blogger as a platform (like we do), this is a great tutorial to walk you through the process of creating blog tabs and getting the image gallery. If you already have blog pages or are using a different blogging platform, you might just want to skip ahead to the code section that you can grab and use in the html section of your own site .
To make the code work for our blog, we liked the look of 3 images in a row instead of 4, so we just stripped out one of the 4 lines of code in the html string the tutorial provides — you can really tweak it however it works best for you. For example, you could add another string of the same code to get 4 images to display in a row, etc.
What DIY projects have you been tackling lately, online or otherwise?
- + | More DIY Projects | + -

I really love what you've done with your DIY gallery. My DIY and recipe index looks exactly like yours used to, and I've been putting off building content buckets because I thought it would involve difficult coding. I wasn't even sure if I could do that on Blogger. Thank you SO much for sharing that tutorial!
ReplyDeleteSo glad this is a help to you and we were totally in the same boat. We will totally keep a look out in our reader for your updates!
DeleteThanks so much for sharing my tutorial with your readers! I appreciate you linking back to me! Your galleries turned out great. :)
ReplyDeleteOh, wow! Thank you so much for sharing! Your DIY gallery looks great now and so much easier to navigate. I hate when I see just a list of projects. It's so much better having everything at a glance.
ReplyDeletewhats the best size for photos?
ReplyDeleteHey Diana, in the gallery a 100x100 seems to be a nice fit for an image gallery. Good luck!
DeleteThanks so much for sharing my tutorial with your readers! I appreciate you linking back to me! Your galleries turned out great!!!
ReplyDeleteI am new at blogging. I am at the stage where I am still trying to figure out the layout for my blog. Thank you so much!
ReplyDeleteYou are quite welcome and good luck with your blog!
DeleteThank you so much for this post. I was finally able to make a gallery for my organizing post!
ReplyDeleteBlessings ♥
Betsy
We are happy you found this useful! Thanks for taking the time to reply.
DeleteGreetings :-) I really like how your DIY gallery has rounded images instead of square. A while back, before finding this post, I has successfully used that same tutorial. I am now wondering how to tweak it to show rounded images. Would you be so kind to share a few tips?
ReplyDeleteBut what will I do if I make photo gallery blog in blogger but later I want to switch to wordpress then what how will I do this please explain
ReplyDelete